On the Mercari app—Japan's flea market—selling used items has become a popular and exciting activity. It is a widely used e-commerce platform that allows you to easily list and buy products from other users all across Japan. However, to successfully sell secondhand goods on Mercari, you need a bit of essential knowledge and skill.
In this article, I will guide you through how to sell used items on the Mercari app in Japan.
Creating a Mercari Account
If you haven't registered for a Mercari account yet, you can check out the guide here:
Once you have logged into Mercari, there will be a button labeled 出品 (List Item) at the bottom of the screen. Select this to start the listing process.
Uploading Product Photos
You can upload existing photos of the item you want to sell, take new ones right there, or use another method: scanning the product's barcode (if it has one). For items with a barcode, the product information will be automatically filled in after scanning, which is very convenient.
Chọn カメラ để chụp ảnh sản phẩm
Chọn バーコード để scan barcode sản phẩm
Entering Product Information
Depending on the type of product, the input fields might vary slightly, but the general fields are as follows:
カテゴリー (Category): Product category
ブランド (Brand): Brand name
商品の状態 (Product Condition): Condition of the item
新品、未使用: New, unused
未使用に近い: Like new
目立った傷や汚れなし: No visible scratches or dirt
やや傷や汚れあり: Slightly scratched or dirty
傷や汚れあり: Scratched or dirty
全体的に状態が悪い: In poor condition overall
商品の特徴 (Product Features): Product characteristics (entering this makes it easier to sell)
商品名 (Product Name): Name of the item (max 40 characters)
商品の説明 (Description): Product description
配送料の負担 (Shipping Fee Payer): Who covers shipping costs
送料込み(出品者負担): Shipping included (Seller pays)
着払い(購入者負担): Cash on delivery (Buyer pays)
配送の方法 (Shipping Method): Method of delivery
発送元の地域 (Shipment Origin): Region sending from
発送までの日数 (Days to Ship): When you will ship. Usually, selecting 1-2 days makes it easier to sell.
販売価格 (Selling Price): The price you want to sell for
販売手数料(10%): Sales commission (10%)
販売利益: Sales profit
Once you've finished entering the product information, you can select 出品する (List) to put it up for sale immediately, or 下書きに保存 (Save Draft) to save it for later.
How to Ship Items on Mercari
Once someone buys your listed item, the system will send you a notification, similar to the illustration below. At this point, you need to ship the item to the buyer.
You can check your to-do list in the やることリスト (To-Do List) menu.
Selecting a Shipping Method
After selecting the sold item, click on 取引画面へ (Go to Transaction Screen). A screen will appear for you to choose the shipping method. The interface might look different between PC and mobile, but the options are the same.
コンビニ・宅急便ロッカーから発送: Ship from a convenience store or delivery locker
ヤマト営業所へ持ち込んで発送: Bring to a Yamato transport office to ship
ヤマトの集荷サービスを利用して発送: Use Yamato's pick-up service (costs 100 yen)
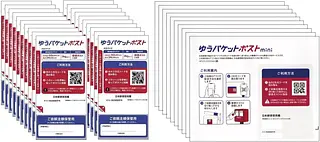
メルカリポストから発送: Ship via Mercari Post
How to Ship Mercari Items at a Convenience Store
A convenient way is to ship Mercari items via a convenience store (konbini). On the screen mentioned above, select コンビニ・宅急便ロッカーから発送 (Ship from Convenience Store/Delivery Locker).
On the next screen, you choose which convenience store you want to ship from. Here, I'm choosing セブン-イレブン (7-Eleven) because it's convenient.
Next, you need to select the size for your shipment. For example, in the illustration, I'm sending a Pokémon card box, so I selected 宅急便コンパクト(専用BOX). Next, enter the name of the item being sent.
If you choose 急便コンパクト(専用BOX), you need to buy the specific box at the convenience store for 70 yen.
After filling in the information, tap 発送用のバーコードを表示する (Display Shipping Barcode) to get your code.
Shipping via Convenience Store
Once you've generated the barcode in the previous step, show it to the staff at 7-Eleven to scan and process the shipment.
After successfully shipping the item, go back to the 取引画面 (Transaction Screen) and complete the process by tapping 商品を発送したので、発送通知をする (I have shipped the item, send shipping notification). The system will then notify the buyer that the item has been shipped.
Successful Transaction
Once the buyer receives the item and rates your product, you will get a notification. Go back to the 取引画面 (Transaction Screen) to rate the buyer in return, and the transaction is complete.
The profit from the sale will be credited to your Mercari account. And just like that, you've successfully listed and sold your item on Mercari! It wasn't too complicated, was it? 😊
Hello everyone. I'm an IT engineer working in Japan. I created this blog to share about life and experiences during my study and work journey. I hope this article will be helpful to you.


")